How YOU can make your family photos and videos look AMAZING!

Introduction.


Family photos and videos are precious keepsakes that help us relive cherished memories and share our stories with future generations. Capturing these moments beautifully requires a combination of composition techniques, creativity, and a keen eye for detail. In this blog post, we’ll explore essential composition techniques and practical tips to help you create stunning family photos and videos look amazing and that you’ll treasure for years to come.


Essential Composition Techniques you can use right now!


1. Rule of Thirds

The Rule of Thirds is a fundamental composition technique that helps create balanced and visually appealing images. To apply this rule, imagine dividing your frame into nine equal parts using two equally spaced horizontal lines and two equally spaced vertical lines. Place your subjects or key elements along these lines or at the intersections to create a more dynamic and engaging composition.

Young girl on the beach holding a light saber and the Rule of Thirds grid as on overlay. One of the technique for how to make your family photos and videos look AMAZING

Scientific studies have gone into this stating that points at which the lines cross are points in which the human eye is drawn. There is a little more to learn about this technique but to help you understand this quickly, think about it this way. If your child’s body is turned to her left. Then position the view so that it looks as if they are looking across the open area. And put their face in the upper left or right cross point.

Young girl on the beach holding a light saber and without the Rule of Thirds grid as finished photo. One of the technique for how to make your family photos and videos look AMAZING

2. Leading Lines

Leading lines are lines within your image that guide the viewer’s eye towards your main subject. These lines can be natural, like a path or a river, or man-made, like a fence or a row of trees. By incorporating leading lines into your family photos and videos, you can create a sense of depth and direct the viewer’s attention to your subjects.

Family at the zoo looking at an animal exhibit. This photo is an example of using leading lines. One of the technique for how to make your family photos and videos look AMAZING.

Man leaning again a wall with state capitol in the background. This photo is an example of using leading lines. One of the technique for how to make your family photos and videos look AMAZING.

3. Framing


Framing involves using elements within your scene to create a frame around your subject. This can be achieved using natural elements like trees, doorways, or windows, or by incorporating props like picture frames or mirrors. Framing helps draw attention to your subject and adds visual interest to your composition.

Man standing on a pathway in a park with trees and pathway as frame. This photo is an example of framing in a picture using environmental elements. One of the technique for how to make your family photos and videos look AMAZING.

Photo of a sloth hanging upside down from a rope. The sloth is framed by foliage. This photo is an example of framing in a picture using environmental elements. One of the technique for how to make your family photos and videos look AMAZING.


Practical Tips to make your family photos and videos look AMAZING!

1. Capture Candid Moments

Candid moments often make the most memorable family photos and videos. Keep your camera ready to capture genuine emotions and interactions between family members. These unposed, spontaneous shots will bring your family’s story to life.

Photo of a woman standing in the ocean drinking coffee early in the morning. This an example of taking a candid photo using composition techniques. This is part of the How to make your family photos and videos look AMAZING blog post.

Black and white photo of a father and daughter walking away from the camera on the beach looking at the ocean. This an example of taking a candid photo using composition techniques. This is part of the How to make your family photos and videos look AMAZING blog post.


2. Pay Attention to Lighting

Lighting plays a crucial role in creating beautiful images and videos. Natural light is your best friend, so try to shoot outdoors or near windows when possible. If you’re shooting indoors, avoid harsh overhead lights and use soft, diffused light sources instead.

Man and woman, husband and wife, walking on the beach away from the camera at sunset as if walking into the sun. This is an example a candid photo that uses the direct sun to for lighting. This is part of the How to make your family photos and videos look AMAZING blog post.

Photo of a woman standing in trees with the sun shining overhead. She is also framed with the branches of the tree. This is part of the How to make your family photos and videos look AMAZING blog post.


3. Get Creative with Angles

Experiment with different angles to add variety and interest to your family photos and videos. Shoot from above, below, or at eye level with your subjects. Don’t be afraid to get down on the ground or climb up on something to find the perfect angle.

This a photo of a young boy playing with sidewalk chalk in a driveway. This is an example of a candid photo using Rule of Thirds and changing angles.

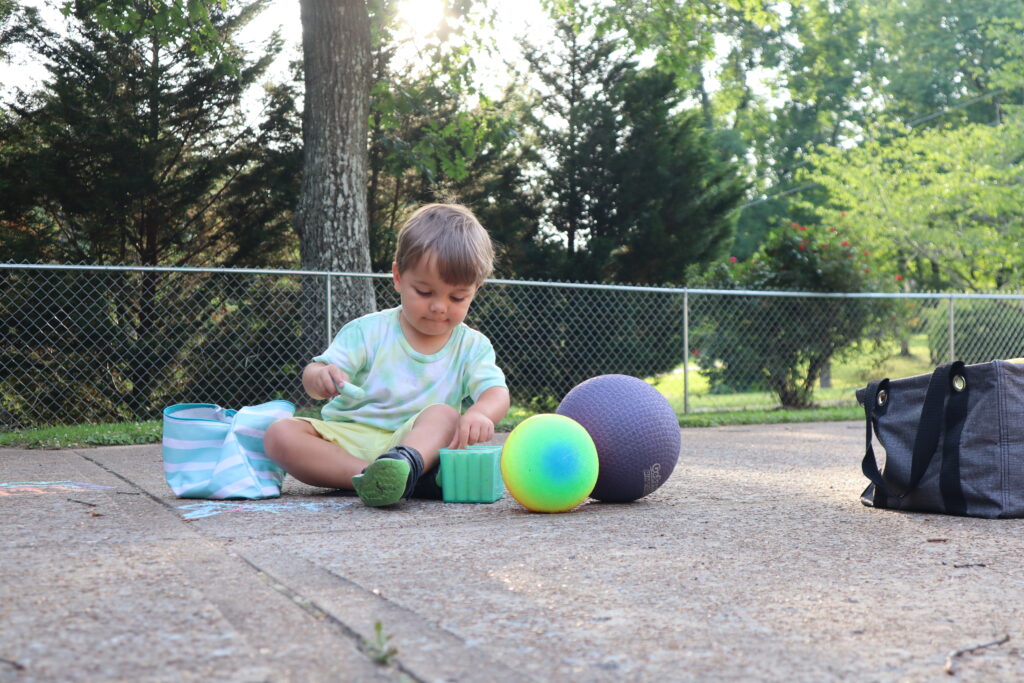
4. Include Props and Activities

Incorporating props and activities into your family photos and videos can add an extra layer of storytelling and make your images more engaging. Use items that have sentimental value or represent your family’s interests, like a favorite toy, a cherished book, or a musical instrument. Plan activities that your family enjoys, such as baking cookies, playing board games, or having a picnic, and capture these moments as they unfold.

Photo of woman and teen with toddlers playing with sidewalk chalk. This is an example using props and activities in photos.

Photo of a man and young boy playing a board game. This is an example using props and activities in photos.

Conclusion.

We hope you found these composition tips helpful in your journey to capturing beautiful family moments. To further enhance your photography and videography skills, we recommend investing in quality camera gear. As a part of affiliate programs for Amazon, we are required to state that we make a small amount of money when you click on the following links. It costs you nothing, and helps us grow our channel.

Recommended camera gear for stunning family photos:

By using the right equipment, such as a reliable camera, versatile lenses, and essential accessories like tripods and external flashes, you can elevate your photography game to new heights. Remember, the gear you choose should align with your specific needs and budget.

Also, make sure to check out our recent blog post on Mother’s Day gift ideas. Now that you’ve learned how to make your family photos amazing, it’s a great opportunity to create personalized gifts that capture beautiful memories. Find inspiration and thoughtful gift ideas in our Mother’s Day blog post.

Don’t forget to follow our blog for more insightful posts and helpful tips to further enhance your family photography and videography skills. We’re here to support you on your photography journey.

Don’t forget to check out our video tutorial on How YOU Can Make YOUR Family Photos and Videos Look AMAZING for a visual guide to these techniques and tips.

Happy shooting, and may your family photos and videos be cherished for generations to come! Thank you for your support!

With the holidays coming up, you will probably be taking a lot of photos of family and friends. Today, we will discuss the preparations you can take to ensure that you capture those precious, fun, loving, and candid memories that can be shared for many years to come.

Phillips 2014 Thanksgiving

When you think of the holidays coming up, do you cringe at the thought of all of the preparations that will need to be taken care of, or are you ready to hit the ground running to be able to enjoy the time of togetherness? More than likely, you are making lists of things that need to be completed, purchased, decorated, or even moved. Before the holidays arrive, make sure that you have prepared your capturing devices. Make sure that you have new or freshly charged batteries. It may be that you need to purchase new memory cards for you digital cameras, whether they are camcorders or still photography cameras. If you are using film based cameras, make sure you have extra film on hand and tapes for recording. Also, it’s a good idea to pull out the manual that you never quite got around to reading and spend some time experimenting with the features. At the very least, make sure you know how to use the timer and how to turn on the flash.
You have huge advantages when your family is your subject: access and familiarity. If your family is accustomed to seeing you with a camera in hand, then you are ahead of the game. They will probably ignore you, and that’s a good thing. As a result, you will be able to capture photos of your loved ones just being themselves.  You can get the best pictures when people are preparing dinner, gift wrapping, chatting, and setting the tables. There are many holiday events in which you and your family will be participating in, and these make for great memories to be seen from now on. Be ready to capture even if you are not planning on capturing. Try to keep the camera at hand, because you never know when great moments are going to happen.  You have already missed the moment by the time you say, “Hold on! Let me get the camera.”
Be thinking about how you will capture those great memories.
Whether you are after a great family portrait in front of your beautifully decorated tree or just capturing the essence of the holidays through candid snapshots, we have compiled a set of tips that will help you master the art of capturing picture-perfect shots.
  • Choose a couple of family members who are good with a camera and put them in charge of taking as many photos as possible. I do realize that that this post is about you capturing the moments. However, it is a good idea to ask multiple people to help so that you can participate in the togetherness and activities. It also helps to get different points of view.


  • Pick a spot or two throughout the places that you will be having the events that will be safe and Naron 2014 Thanksgivingsecure to set up a tripod. This will be a place to set up the camera(s) to record the activities of that room without standing behind it. Remember to check on it from time to time. If you have a remote for your camera, you could randomly hit the capture button. If it has a time lapse mode (taking pictures on a set timer), set it, and let it work. Picking a spot will give two advantages. First and foremost, it will be a place to keep everything together in one place as to not get lost, kind of a home base for the camera(s). Secondly, in the event that charging needs to be done, you know where all of the chargers are.


  • Also, when you are capturing the moments of children, don’t just stand there. Get down to their level for the best images. With supervision, why not hand the camera to them, and let them show you what they see.IMG_20131130_201636_602


  • Use props for your holiday guests to use in silly family photos. Put out some silly hats, glasses, large empty picture frames, and have your loved ones hold them up in silly ways to get some candid captures.


  • The holidays are often the only time the entire family is gathered together, making it a prime opportunity for capturing a full-family portrait. When setting up group photos, choose a location where you can arrange family members in a pleasant way and get everyone close together. Arrange members at different heights so you don’t just have a family line-up — faces should fill most of the frame. To create a perfect indoor shot, pull the couch a few feet from the wall, which will prevent a flash casting harsh, dark shadows. Then you can also have people stand behind the couch as well as sit in front of it, so you have three tiers of faces. Consider switching up the traditional adult-above-children arrangement by having some adults sitting on the floor and some children standing on boxes. Don’t try to perfect every aspect — you’ll never get every cowlick tamed and shirt tucked. They’re you’re lovable, imperfect family, after all, and to truly capture their essence, let them be themselves. To ensure you don’t get a family of red-eyed demons, ask your family to look anywhere but straight at the camera lens.


  • For small groups or solos, remember that the eyes and mouth are the most important features to capture. You’ll want to be at eye-level for a close, intimate feeling. Decide how much of your child you want in the picture, then frame him so you’re not cutting off his body exactly at the waist, shoulders, or knees. Just as you don’t want to have your child’s face dead center, his body shouldn’t be facing the camera straight on. Instead, turn him about a quarter-turn away from you and have him look back at you. For a more connected result, make eye contact with your child before you click the shutter. For a timeless look, consider using black and white for portraits.


Putting in the extra effort to capture the moment with your family now will pay off in the end.
While your children might not want to take a picture right now, many years from now they will look back be able to remember their childhood and share with their children the fun that was had before them.
Set up a way for past years moments to be watched. Our family loves to watch them! If you need help doing this, check out

Watching and Sharing Your Home Movies

.

Finally, be sure not to be greedy with all of those moments that you have captured. Set aside some time to copy them to your computer, make disks to give out, and ask for trades from others that were there.
So, be prepared with all of you devices, batteries, flashes, memory cards, films, and tapes. Refresh your memory of how the device works. Make a list of specific pictures and portraits that you would like to take and have your family help you get them. Don’t just look for posed moments, but also, be sure to get candid shots that take place. Capture the preparation of the food, casual gatherings, and welcoming moments.  Try to get different view points. Once the fun has ended but before everyone leaves, share the media. Try all of these tips to help you capture and celebrate the holidays in a more creative way. Happy Holidays!


Baby’s first steps, the first day of school, or a 50th wedding anniversary — you’ve probably captured many memories with your camcorder. What will you do with all that footage? Will you play it back on your TV? Will you make copies to share with friends and family? Will you edit your files and archive them to enjoy for years to come? Below, we’ll look at what you can do with your camcorder footage and offer our suggestions and tips for getting the best results with your home movies.

Today, we are using an article that was posted on crutchfield.com. This was a very informative article on how to play and archive your camcorder videos. We give all credit to the author, Tara W. at Crutchfield for all of the hard work. The article was a little dated so we went through and got the information more up-to-date.

Playing your videos on a TV

Adobe Stock
Adobe Stock

Watching your footage on a TV is simple enough — simply connect the camcorder to your TV with the audio/video cables that come in the box. Most camcorders come with a composite video cable, but if you have a high-def camcorder and want to use its component video or HDMI connection, then you’ll probably need to purchase these cables separately. And if you go with an HDMI connection, you won’t have to make a separate audio connection to you TV, since HDMI can pass both video and audio signals.

Watching your videos on a computer

Most camcorders transfer video files and photos onto your computer via a USB interface. Most newer computers have high-speed USB ports, but if you’re using an older computer then you may have a full-speed USB port, which just means that your video transfer might take a little longer. If you have an older mini DV or Digital8® camcorder, you’ll probably need an i.LINK® (IEEE 1394) jack to transfer digital video from the cam to your computer. If you have a newer computer without an i.LINK jack, it should be fairly easy and inexpensive to add one via an optional PCI or PC card.

connections

Mini DV camcorders use i.Link jacks (left) to transfer videos to a computer, while hard drive and mini DVD camcorders use USB ports (right).

New ways to share and enjoy your videos

With recent technology advances, it’s become easier than ever to copy and share footage for all to see. Here are a few new ways to share your home movies:

  • Post your videos on a website. Video-sharing sites like YouTube™ and video blogs make it easy to post footage that your friends and family can view. Post clips of baby’s first steps, your child’s birthday, or that crazy family reunion you went to last year. You can use special software to compress your recordings for posting on these sites, or invest in a web-friendly cam that produces videos that are easy to upload to sites or e-mail directly to family.
  • Store footage on an iPod®, iPhone®, or MP3 player. Transfer video clips to your portable player and show them off to family members next time you get together at the holidays. Putting videos on a portable player may also require special software that converts your videos to a compatible format. Some players can be connected to a TV for large-scale playback of your videos.
  • Use the SD card slot or USB port on your HDTV. Some newer HDTVs offer built-in SD memory card slots and USB ports. That means that if you have an SD memory card camcorder, you can copy footage onto the SD card and pop it into the card slot on a compatible HDTV. And of course you can connect just about any camcorder with a USB port up to a compatible HDTV. Just be sure to check your television’s manual to be sure that it’ll play back video, and that it’s compatible with your camcorder’s video recording format. A lot of newer Blu-ray players, game consoles, and receivers also offer SD card slots or USB inputs, in case your TV doesn’t have one.
  • Stream your videos to your TV. If you have your videos stored on your computer, then it’s easy to stream them to your TV or other compatible home theater gear. You won’t need any cables to connect your camcorder to your TV, and will have your whole library of videos on your computer at your finger tips.

Copying and archiving your footage for yourself and others

It’s unfortunate, but discs and tapes can break, wear out, or get lost, and hard drives fail eventually. So we recommend that you make multiple copies of your videos. You can use a number of different devices to make copies of your footage — from DVD recorders to your computer (if it has a DVD burner).

DVD recorders for camcorders are designed specifically to help people archive their camcorder footage. They’re especially handy for folks who have a hard drive camcorder but don’t have a computer with a DVD burner. You’ll probably use the USB output on your camcorder to make a digital connection to these DVD recorders. Then, you can record your footage on full-size DVD discs for playback in most DVD or Blu-ray players.

Some DVD recorders may only offer standard-definition recording. Others will allow you to copy standard- and high-definition video footage — a big plus for HD camcorder owners. You’ll be able to downconvert your high-definition (HD) videos for playback on most DVD players, or maintain the high resolution of HD video files for playback on the recorder itself or a compatible Blu-ray Disc™ player.

Another archival option: use your PC and an external hard drive.
If you have a PC, you can attach an external hard drive to your computer and simply copy footage from your tapes and discs onto the hard drive. Saving files onto an additional hard drive lets you keep your computer’s internal one free for everyday needs. Finally, if you fill up an external hard drive with your home movies, you can unplug it and keep it somewhere safe, and connect a new one for your next batch of archives. It might not be a bad idea to make a regular schedule to copy your irreplaceable footage to archive drives on a regular basis and duplicate those. Then house those duplicate drives in a nice, climate controlled place that’s not your home. That way you’re covered for most mishaps, whether the cause is human, natural or mechanical.

Online storage, while a great idea for documents and pictures, can easily be overwhelmed by the sheer data space requirements of video archiving. Aside from the fact that video takes up a lot of storage space, the time you’d need to devote to uploading and downloading material would probably be measured in days over many internet connections. If you want to save a few important, selected clips, it’s not the worst place to do so, but remember to check out the storage site’s guidelines on file size limits, and check those monthly or annual costs carefully. It’s also a good idea to read some customer reviews, if you can.

Relive Your Memories! You Shoot It – We Edit!

Casually Sharp Multimedia

Now, don’t let these precious moments stay stored on hard drives, memory cards, or tapes for months, years, and sometimes, even forgotten forever. Memories are like diamonds, and happy memories are like those rare diamonds that always remind us of our happy days and keep our hope for a better life ahead. These precious memories are worth preserving. Casually Sharp Multimedia is the perfect place to bring out the best in your photos and videos. We can be as creative as you want and need. Give us an opportunity to help carve your memories in the shape of videos! Relive your memories! You shoot it – we edit! ServicesPricing.