How YOU can make your family photos and videos look AMAZING!

Introduction.


Family photos and videos are precious keepsakes that help us relive cherished memories and share our stories with future generations. Capturing these moments beautifully requires a combination of composition techniques, creativity, and a keen eye for detail. In this blog post, we’ll explore essential composition techniques and practical tips to help you create stunning family photos and videos look amazing and that you’ll treasure for years to come.


Essential Composition Techniques you can use right now!


1. Rule of Thirds

The Rule of Thirds is a fundamental composition technique that helps create balanced and visually appealing images. To apply this rule, imagine dividing your frame into nine equal parts using two equally spaced horizontal lines and two equally spaced vertical lines. Place your subjects or key elements along these lines or at the intersections to create a more dynamic and engaging composition.
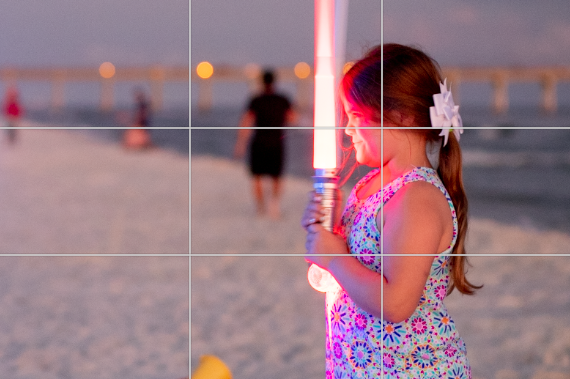
Young girl on the beach holding a light saber and the Rule of Thirds grid as on overlay. One of the technique for how to make your family photos and videos look AMAZING

Scientific studies have gone into this stating that points at which the lines cross are points in which the human eye is drawn. There is a little more to learn about this technique but to help you understand this quickly, think about it this way. If your child’s body is turned to her left. Then position the view so that it looks as if they are looking across the open area. And put their face in the upper left or right cross point.

Young girl on the beach holding a light saber and without the Rule of Thirds grid as finished photo. One of the technique for how to make your family photos and videos look AMAZING

2. Leading Lines

Leading lines are lines within your image that guide the viewer’s eye towards your main subject. These lines can be natural, like a path or a river, or man-made, like a fence or a row of trees. By incorporating leading lines into your family photos and videos, you can create a sense of depth and direct the viewer’s attention to your subjects.

Family at the zoo looking at an animal exhibit. This photo is an example of using leading lines. One of the technique for how to make your family photos and videos look AMAZING.

Man leaning again a wall with state capitol in the background. This photo is an example of using leading lines. One of the technique for how to make your family photos and videos look AMAZING.

3. Framing


Framing involves using elements within your scene to create a frame around your subject. This can be achieved using natural elements like trees, doorways, or windows, or by incorporating props like picture frames or mirrors. Framing helps draw attention to your subject and adds visual interest to your composition.
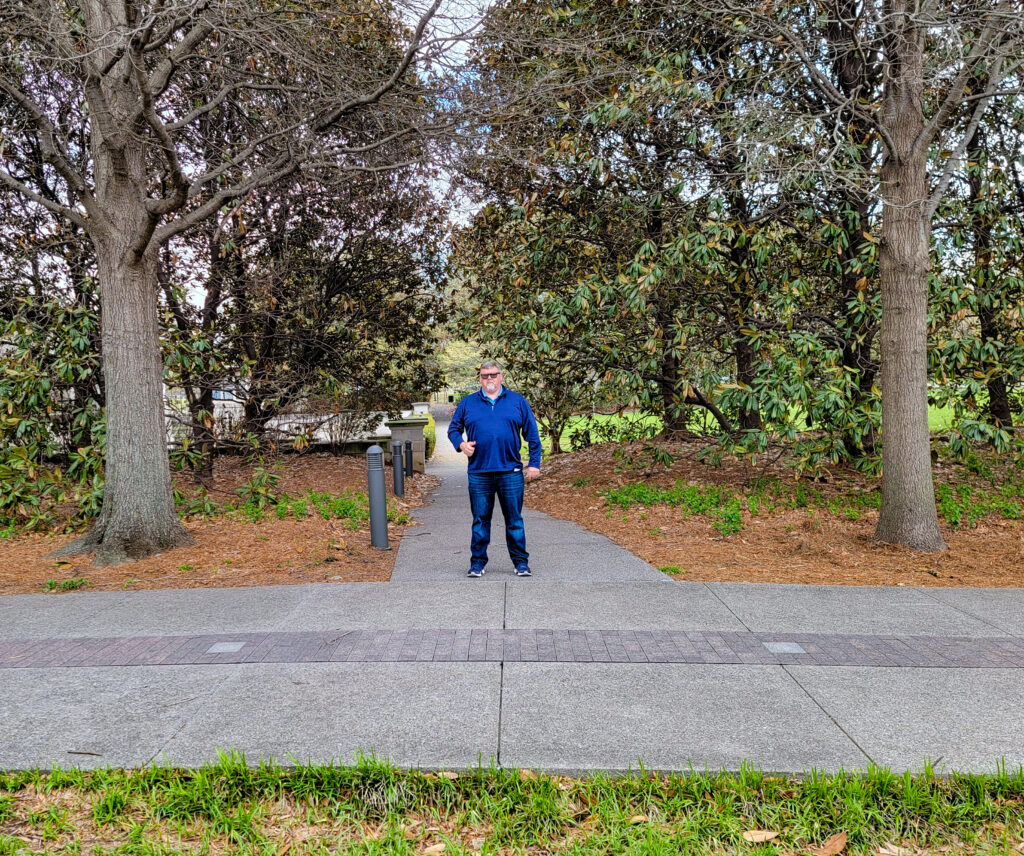
Man standing on a pathway in a park with trees and pathway as frame. This photo is an example of framing in a picture using environmental elements. One of the technique for how to make your family photos and videos look AMAZING.

Photo of a sloth hanging upside down from a rope. The sloth is framed by foliage. This photo is an example of framing in a picture using environmental elements. One of the technique for how to make your family photos and videos look AMAZING.


Practical Tips to make your family photos and videos look AMAZING!

1. Capture Candid Moments

Candid moments often make the most memorable family photos and videos. Keep your camera ready to capture genuine emotions and interactions between family members. These unposed, spontaneous shots will bring your family’s story to life.


Photo of a woman standing in the ocean drinking coffee early in the morning. This an example of taking a candid photo using composition techniques. This is part of the How to make your family photos and videos look AMAZING blog post.

Black and white photo of a father and daughter walking away from the camera on the beach looking at the ocean. This an example of taking a candid photo using composition techniques. This is part of the How to make your family photos and videos look AMAZING blog post.


2. Pay Attention to Lighting

Lighting plays a crucial role in creating beautiful images and videos. Natural light is your best friend, so try to shoot outdoors or near windows when possible. If you’re shooting indoors, avoid harsh overhead lights and use soft, diffused light sources instead.

Man and woman, husband and wife, walking on the beach away from the camera at sunset as if walking into the sun. This is an example a candid photo that uses the direct sun to for lighting. This is part of the How to make your family photos and videos look AMAZING blog post.

Photo of a woman standing in trees with the sun shining overhead. She is also framed with the branches of the tree. This is part of the How to make your family photos and videos look AMAZING blog post.


3. Get Creative with Angles

Experiment with different angles to add variety and interest to your family photos and videos. Shoot from above, below, or at eye level with your subjects. Don’t be afraid to get down on the ground or climb up on something to find the perfect angle.
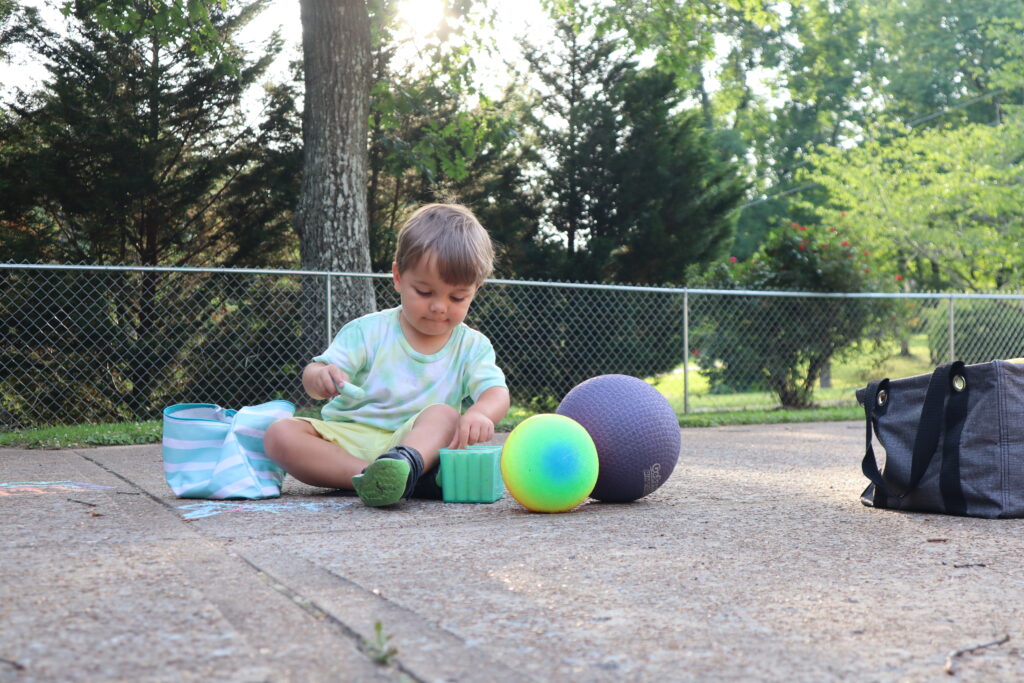
This a photo of a young boy playing with sidewalk chalk in a driveway. This is an example of a candid photo using Rule of Thirds and changing angles.

4. Include Props and Activities

Incorporating props and activities into your family photos and videos can add an extra layer of storytelling and make your images more engaging. Use items that have sentimental value or represent your family’s interests, like a favorite toy, a cherished book, or a musical instrument. Plan activities that your family enjoys, such as baking cookies, playing board games, or having a picnic, and capture these moments as they unfold.


Photo of woman and teen with toddlers playing with sidewalk chalk. This is an example using props and activities in photos.

Photo of a man and young boy playing a board game. This is an example using props and activities in photos.

Conclusion.

We hope you found these composition tips helpful in your journey to capturing beautiful family moments. To further enhance your photography and videography skills, we recommend investing in quality camera gear. As a part of affiliate programs for Amazon, we are required to state that we make a small amount of money when you click on the following links. It costs you nothing, and helps us grow our channel.

Recommended camera gear for stunning family photos:

By using the right equipment, such as a reliable camera, versatile lenses, and essential accessories like tripods and external flashes, you can elevate your photography game to new heights. Remember, the gear you choose should align with your specific needs and budget.

Also, make sure to check out our recent blog post on Mother’s Day gift ideas. Now that you’ve learned how to make your family photos amazing, it’s a great opportunity to create personalized gifts that capture beautiful memories. Find inspiration and thoughtful gift ideas in our Mother’s Day blog post.

Don’t forget to follow our blog for more insightful posts and helpful tips to further enhance your family photography and videography skills. We’re here to support you on your photography journey.

Don’t forget to check out our video tutorial on How YOU Can Make YOUR Family Photos and Videos Look AMAZING for a visual guide to these techniques and tips.

Happy shooting, and may your family photos and videos be cherished for generations to come! Thank you for your support!

The Challenge of Finding a Meaningful Mother’s Day Gift: A Solution for Preserving Memories Digitally

Introduction:

Finding the perfect Mother’s Day gift is challenging. We all want to convey our love and appreciation in a way that touches our mothers’ hearts. Traditional gifts often fall short. That’s where the problem lies. But fear not! In this article, we explore the problem of finding a meaningful Mother’s Day gift and present a solution: preserving memories digitally through a personalized photo album. Discover how this innovative approach helps you create a memorable experience for your mother.

The Problem: The Search for a Meaningful Mother’s Day Gift

Every year, Mother’s Day approaches, and we embark on a quest to find that special gift. We want something that tells a unique story, captures cherished memories, and conveys our deep emotions. Traditional options lack the personal touch and fail to create a lasting impression.

The Solution: Preserving Memories Digitally with a Personalized Photo Album

Imagine the joy on your mother’s face as she flips through a personalized photo album. Each page brings forth a flood of emotions, as cherished memories come to life. Preserving memories digitally through a customized photo album is the perfect solution. It allows you to curate heartfelt photos that beautifully narrate your unique story, creating a seamless flow of emotions.

Digitizing Old Photos: Embracing the Past, Enriching the Present

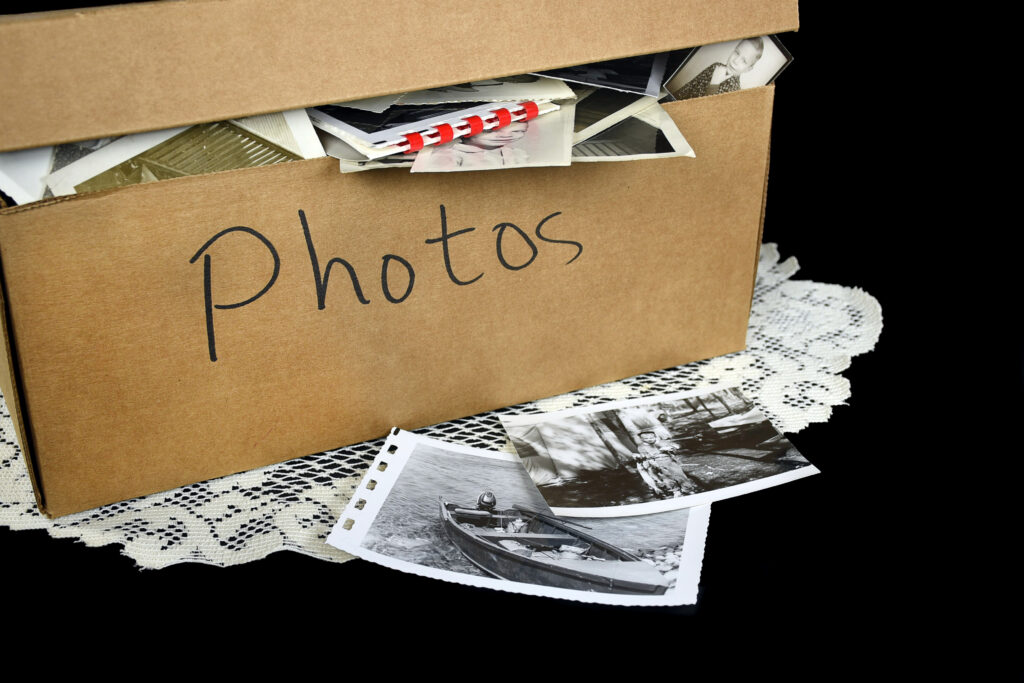
box of old photos. To make your personalized photo album more meaningful, it’s essential to digitize your collection of old printed photos. We have another post that goes into more detail about the digitization process for videos. You can find it here. Many of us tuck away cherished family photos, eagerly waiting to rediscover them. By digitizing these prints, you breathe new life into them and ensure they become an integral part of your gift. Utilize a scanner or your smartphone camera to transform these physical memories into high-quality digital images, preserving the nostalgia and sentimentality they hold.
For those looking for a reliable scanner option, the Epson Perfection V550 scanner is highly recommended. This scanner offers high-quality scans, ensuring that your old printed photos are accurately transformed into digital images. Preserving the integrity and details of each cherished photograph becomes effortless with this reliable scanner.

Creating a Customized Photo Book: Crafting a Lasting Tribute

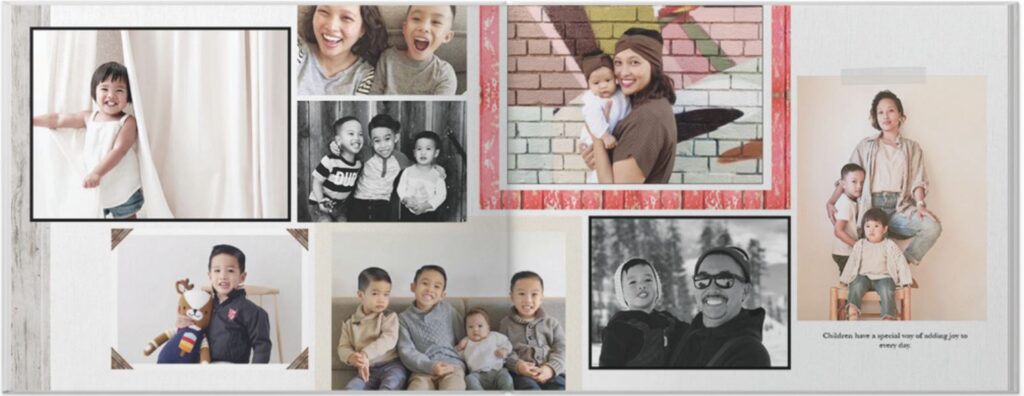
Open Photo Book of family photos from Shutterfly.com
Open Photobook of family photos from shutterfly.com

With your digitized photo collection ready, create a customized photo book that touches your mother’s heart using Shutterfly’s intuitive platform. shutterfly.com  Their user-friendly tools will help bring your vision to life. Easily upload digital photos, including the digitized versions of old prints. Explore pre-made templates tailored for Mother’s Day or your desired theme. Customize your album with personalized captions, heartfelt messages, and unique layouts and backgrounds.”


Conclusion:

Finding a meaningful Mother’s Day gift is surmountable. Preserve memories digitally, curate a personalized photo album, and give your mother a gift that truly speaks to your love and appreciation. This heartfelt gift extends beyond a single occasion and becomes a keepsake that celebrates your bond. Embrace the opportunity to create something extraordinary. Start crafting your personalized photo album today and celebrate the special women in your life in an unforgettable way. Let them know their love and care are etched in your heart forever. You can even watch the video below to explore more gift ideas for mom.


Notes:

I’m required to state that I’m a part of affiliate programs for Amazon and Kit, which means that I make a small amount of money when you click on those links in my video descriptions. It costs you nothing, and helps me grow my business. Thank you for your support!

[fusion_builder_container type=”flex” hundred_percent=”no” equal_height_columns=”no” hide_on_mobile=”small-visibility,medium-visibility,large-visibility” background_position=”center center” background_repeat=”no-repeat” fade=”no” background_parallax=”none” parallax_speed=”0.3″ video_aspect_ratio=”16:9″ video_loop=”yes” video_mute=”yes” border_style=”solid”][fusion_builder_row][fusion_builder_column type=”1_1″ type=”1_1″ background_position=”left top” border_style=”solid” border_position=”all” spacing=”yes” background_repeat=”no-repeat” margin_top=”0px” margin_bottom=”0px” animation_speed=”0.3″ animation_direction=”left” hide_on_mobile=”small-visibility,medium-visibility,large-visibility” center_content=”no” last=”no” hover_type=”none” min_height=”” link=””][fusion_text]

Storing Your Photos and Videos.

Do the following statements sound familiar?

“Where did I save those pictures of the birthday party?” or  “Help! My computer has crashed, and I can’t get to my pictures and files!” 

How do you go about storing your photos and videos? Do you have documents, music, and pictures stored in and on random USB flash drives, memory cards, and disks? When you are wanting to use them, you are scrambling to find them and searching through all of your devices to find what you are looking for. What is your plan for storing your photos and videos? 

The Assessment:

Do you need the 3 step plan for storing your photos and videos? Let me answer for you. Yes, you do. But if you are still wondering, then let’s take a quiz.

Do you have photos (printed or digital) and videos (tapes or digital) of you and your family from past to present?

Are there photo prints and tapes stored in a box/drawer in the closet/attic/basement? How about those digital ones?

Are they sporadically stored on your computer, phone, or camera cards? You may be one that purchased a USB drive but is it being put to good use?

Do you have a plan in place if something were to happen to them?


Did you answer yes to all of the above? Great! Even the last one? No? Then you do need the 3 step plan for storing your photos and videos?

The Steps:

I will share with you the 3 step plan for storing your photos and videos right now.

Yes, here they are!


Step 1

Gather, Give Structure


Step2

Back-up


Step 3

Make them safe

Sounds simple, right?  Well, basically it is that simple.

Then why do you need to attend a workshop on how to do this?  Ah, now that is the right question.

Why the Plan?:

If you were to follow just these three steps without a plan would you be able to share those pictures to friends and family quickly? Can you ensure that you aren’t missing photos or videos on a regular backup? Can you make sure that they are safe from harm?

I have witnessed the heartbreak over many years of helping so many people try and recover lost photos on their computers. Also I have listened to others be disappointed at wishing that they had converted those videos after a disaster.

What if you could have your photos and videos ready to be shared in an organized way to those you want to share them? And also keep them safe? This is why you will want to attend the storing your memories workshop and learn the 3 step plan for storing your photos and videos!

If you are ready then let’s get started!

Storing Your Memories Workshop


[/fusion_text][/fusion_builder_column][/fusion_builder_row][/fusion_builder_container]

[fusion_builder_container type=”flex” hundred_percent=”no” equal_height_columns=”no” menu_anchor=”” hide_on_mobile=”small-visibility,medium-visibility,large-visibility” class=”” id=”” background_color=”” background_image=”” background_position=”center center” background_repeat=”no-repeat” fade=”no” background_parallax=”none” parallax_speed=”0.3″ video_mp4=”” video_webm=”” video_ogv=”” video_url=”” video_aspect_ratio=”16:9″ video_loop=”yes” video_mute=”yes” overlay_color=”” video_preview_image=”” border_color=”” border_style=”solid” padding_top=”” padding_bottom=”” padding_left=”” padding_right=””][fusion_builder_row][fusion_builder_column type=”1_1″ layout=”1_1″ background_position=”left top” background_color=”” border_color=”” border_style=”solid” border_position=”all” spacing=”yes” background_image=”” background_repeat=”no-repeat” padding_top=”” padding_right=”” padding_bottom=”” padding_left=”” margin_top=”0px” margin_bottom=”0px” class=”” id=”” animation_type=”” animation_speed=”0.3″ animation_direction=”left” hide_on_mobile=”small-visibility,medium-visibility,large-visibility” center_content=”no” last=”true” min_height=”” hover_type=”none” link=”” border_sizes_top=”” border_sizes_bottom=”” border_sizes_left=”” border_sizes_right=”” first=”true”][fusion_text]

[/fusion_text][/fusion_builder_column][/fusion_builder_row][/fusion_builder_container][fusion_builder_container type=”flex” hundred_percent=”no” equal_height_columns=”no” menu_anchor=”” hide_on_mobile=”small-visibility,medium-visibility,large-visibility” class=”” id=”” background_color=”” background_image=”” background_position=”center center” background_repeat=”no-repeat” fade=”no” background_parallax=”none” parallax_speed=”0.3″ video_mp4=”” video_webm=”” video_ogv=”” video_url=”” video_aspect_ratio=”16:9″ video_loop=”yes” video_mute=”yes” overlay_color=”” video_preview_image=”” border_color=”” border_style=”solid” padding_top=”” padding_bottom=”” padding_left=”” padding_right=””][fusion_builder_row][fusion_builder_column type=”1_1″ layout=”1_1″ background_position=”left top” background_color=”” border_color=”” border_style=”solid” border_position=”all” spacing=”yes” background_image=”” background_repeat=”no-repeat” padding_top=”” padding_right=”” padding_bottom=”” padding_left=”” margin_top=”0px” margin_bottom=”0px” class=”” id=”” animation_type=”” animation_speed=”0.3″ animation_direction=”left” hide_on_mobile=”small-visibility,medium-visibility,large-visibility” center_content=”no” last=”true” min_height=”” hover_type=”none” link=”” border_sizes_top=”” border_sizes_bottom=”” border_sizes_left=”” border_sizes_right=”” first=”true”][fusion_text][fusion_builder_container type=”flex” hundred_percent=”no” equal_height_columns=”no” menu_anchor=”” hide_on_mobile=”small-visibility,medium-visibility,large-visibility” class=”” id=”” background_color=”” background_image=”” background_position=”center center” background_repeat=”no-repeat” fade=”no” background_parallax=”none” parallax_speed=”0.3″ video_mp4=”” video_webm=”” video_ogv=”” video_url=”” video_aspect_ratio=”16:9″ video_loop=”yes” video_mute=”yes” overlay_color=”” overlay_opacity=”0.5″ video_preview_image=”” border_size=”” border_color=”” border_style=”solid” padding_top=”” padding_bottom=”” padding_left=”” padding_right=””][fusion_builder_row][fusion_text]

[/fusion_text][/fusion_builder_column][/fusion_builder_row][/fusion_builder_container]

The holidays are upon us: the frantic time of the year when you are just cleaning up from a Thanksgiving meal, planning family time, swapping out decorations, and shopping for gifts. Okay, Okay, don’t get upset with me for reminding you how stressful this time of year is, but I do have a question for you…

What type of gift do you give to someone that means more to them than anything money can buy? Well, my friend, the answer is two-fold, a well thought out gift that is made specifically for them. It could be made by your hands or by someone else’s, but the idea is that is made for them, as well as a gift that speaks to their heart. This type of gift is worth more than gold when given as one made with your own hands.

Have I intrigued you enough to find out what the gift should be and how to get it? I hope so! 

The gift I am referring to is the gift of remembering the good times of the past. Yes, the memories of yesterday that you have heard shared many times. Now, if your family is like mine, I am referring to the telling of days “Way Back When”and not the pranks, snarkiness, and noogies (which are all fun and part of having a loving family), then you more than likely have videos and home movies stashed away in the attic or garage. 

This is what you do. Dig out those old tapes, and blow the dust off of the boxes they are in. Find an old VCR. Goodwill, eBay, and yard sales will still have these if you don’t have one. Then click on this link to purchase the VIDBOX Video Conversion Suite.

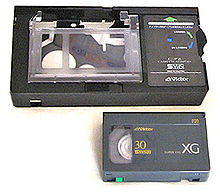
VHS-C cassette and Adapter
Image Credit: Wikipedia

If you have the small VHS-C cassettes then you will need a VHS-C Cassette Adapter to play them in the VCR. However, if you have tapes that are  small and say “Hi-8mm” then you will need

hi8 tapes
Image Credit: Wikipedia

 to have a video camera that will play these types of tapes. This is where Goodwill, eBay and yard sales are needed again. 


The VIDBOX comes with a small box that connects composite (Red White, and Yellow “RCA”) video sources (VCRs and old cameras) to it and then the box connects to your computer. 

* Illustration from VIDBOX

Once you have installed the software onto your computer, it walks you through the process of starting the recording. Be sure to allow time for the videos to play through. The process can be quite long if you have many tapes. Now once the videos are recorded onto your computer, you can then use a DVD authoring program to create menus and custom backgrounds for when played on a DVD player.  This process we will go over soon in another post.

Right now I want to get you thinking about where those old “home movies” are that you used to dread having to sit through as a child and beginning the first steps of converting them to digital. Did you see what just happened? In 450 words or less you just learned how to digitize your old VHS tapes.  Think about the joy that you will bring to your loved ones when they get this gift that you have made with your hands for them specifically. 

There are many fun ways that you can make this interesting and I hope that you will follow along on this journey and found out just what we mean by this. In the mean time, lets get “digital.”


I’m required to state that I’m a part of affiliate programs for Amazon and Kit, which means that I make a small amount of money when you click on those links in my video descriptions. It costs you nothing, and helps me grow my business. Thank you for your support!